Hey guys!!! Guess who. Me.
I thought it would be cool this week to break down the process of UV mapping. We’re going to be projecting images onto a set with protruding set pieces and angles, so trying to get clean shapes mapped onto it will be a challenge. Theo, one of our amazing artists and 2d animation expert and general life guru breaks down the process below.

This is a simple breakdown of how we flatten out a 3D shape (in this case a cube) to draw a line on it. You can see how the straight red line on the left is wrapped around the cube when it’s mapped back onto it in 3D space.
When you want to “unwrap” something, you’re essentially flattening it into an image that you can paint on. Think of flattening a cardboard box, painting on it, and then building it back into a 3D box. The flat image you create in this process is called a “UV map”. The UV map can be laid out in multiple ways, and the way it’s laid out or flattened has a huge impact on the ease of painting on it without getting “seams” or visible distortion.
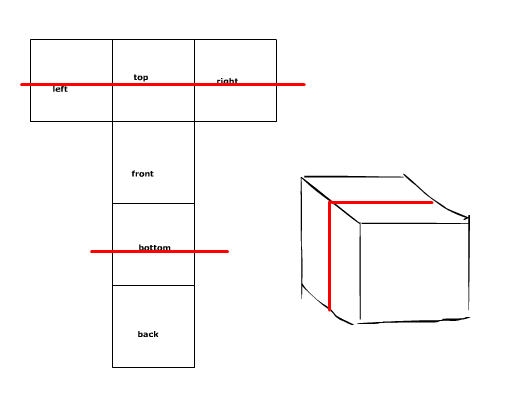
In this example, in order to get the red line to flow across the cube sideways, it has to be split up in odd ways on the map, making it a bit more challenging to paint while keeping the line continuous.
Ya with me so far? Good because it’s about to get more complicated!
Since we’re projecting onto a stage, we’re going to have to consider the perspective of the audience as well. Where they’re sitting in the theater will affect how they’re going to view the projection. The above examples are simple and straightforward; map a straight line directly onto a cube, in line with the cube faces. But what if we’re looking at the cube sitting far back and off to the side in a theater? And what if we want to map a straight line across the cube diagonally, cutting across its faces?

To create a straight line cutting across the cube diagonally from a perspective view, we have to get gnarly.
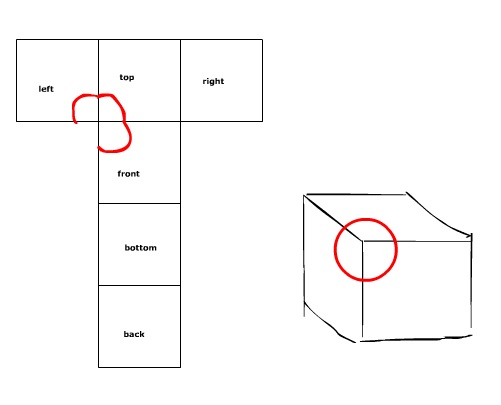
Now, what if we want to project something more complicated than just a line? Because lines are great, but we’re gonna need a bit more complexity than that. Below are a couple examples of how we might project circles onto a cube. As you can see, we’re inevitably going to have to fight distortion by accounting for it in the UV map (in the first image). If we use a perfect circle on the UV map (the second image), it will get distorted in the projection.

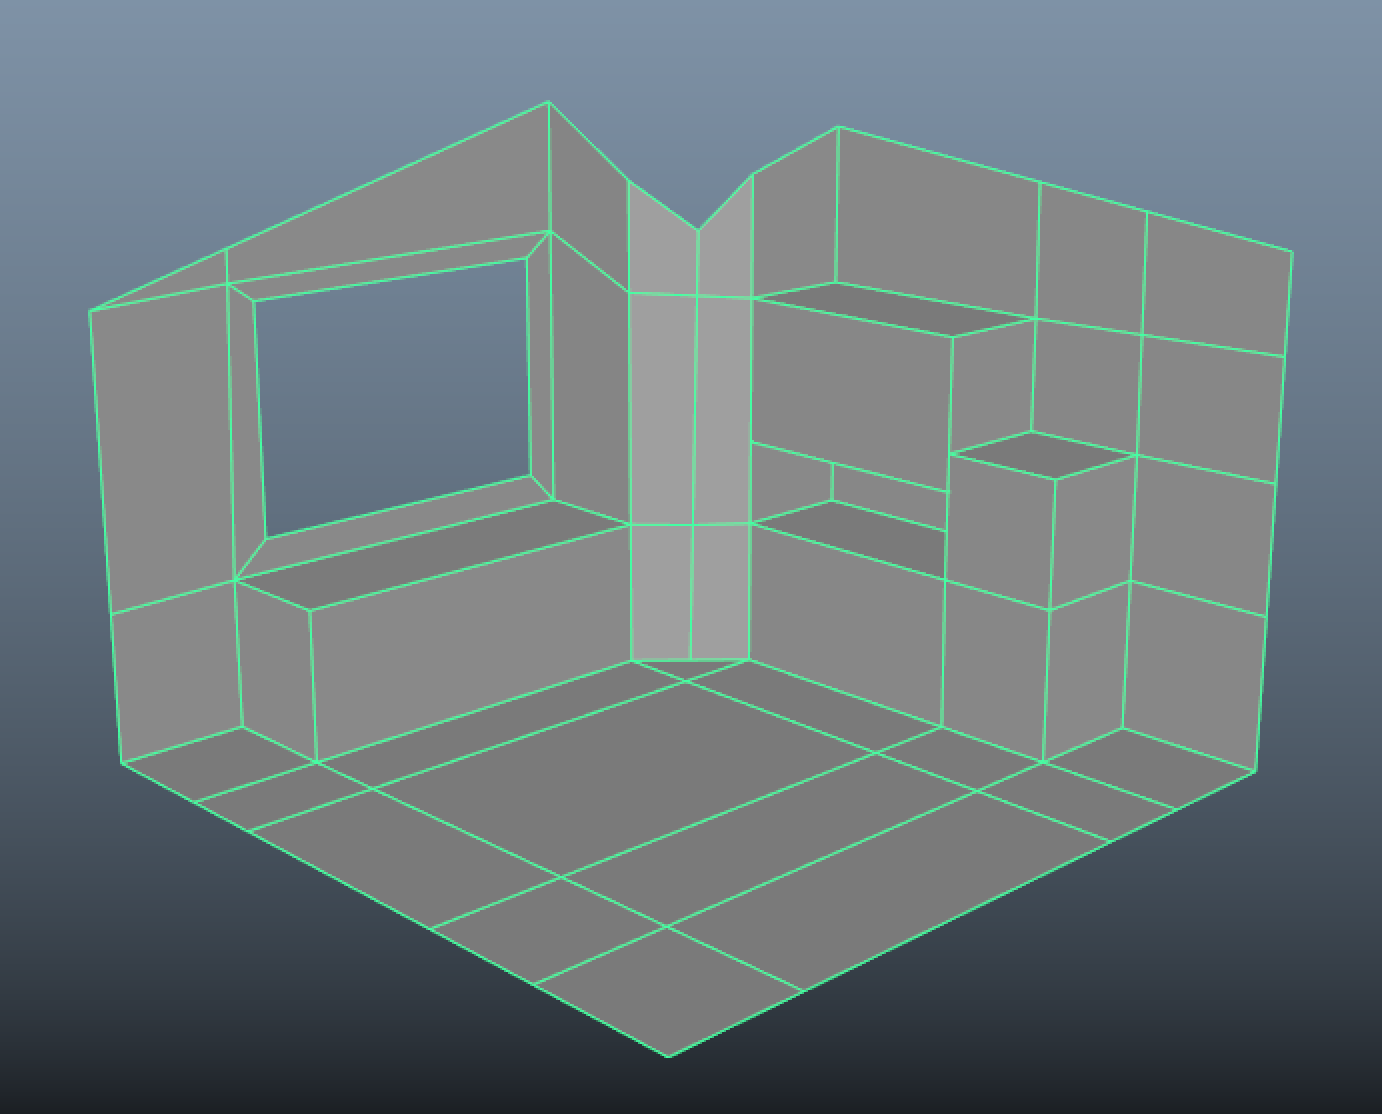
So cubes are great, but unfortunately the set isn’t a cube. Bummer, right? It has props and angles and protruding shapes and all that fun stuff. Below is a super simple mockup of the set we’ll be working with. The UV map is on the left, and mapping a straight line across it isn’t too complicated! But straight lines are for squares. Ha.

Remember that we’re also dealing with the audience’s point of view, so even a straight line will appear a bit distorted if you’re not seeing it at the optimal angle (sitting off to the side or above it).
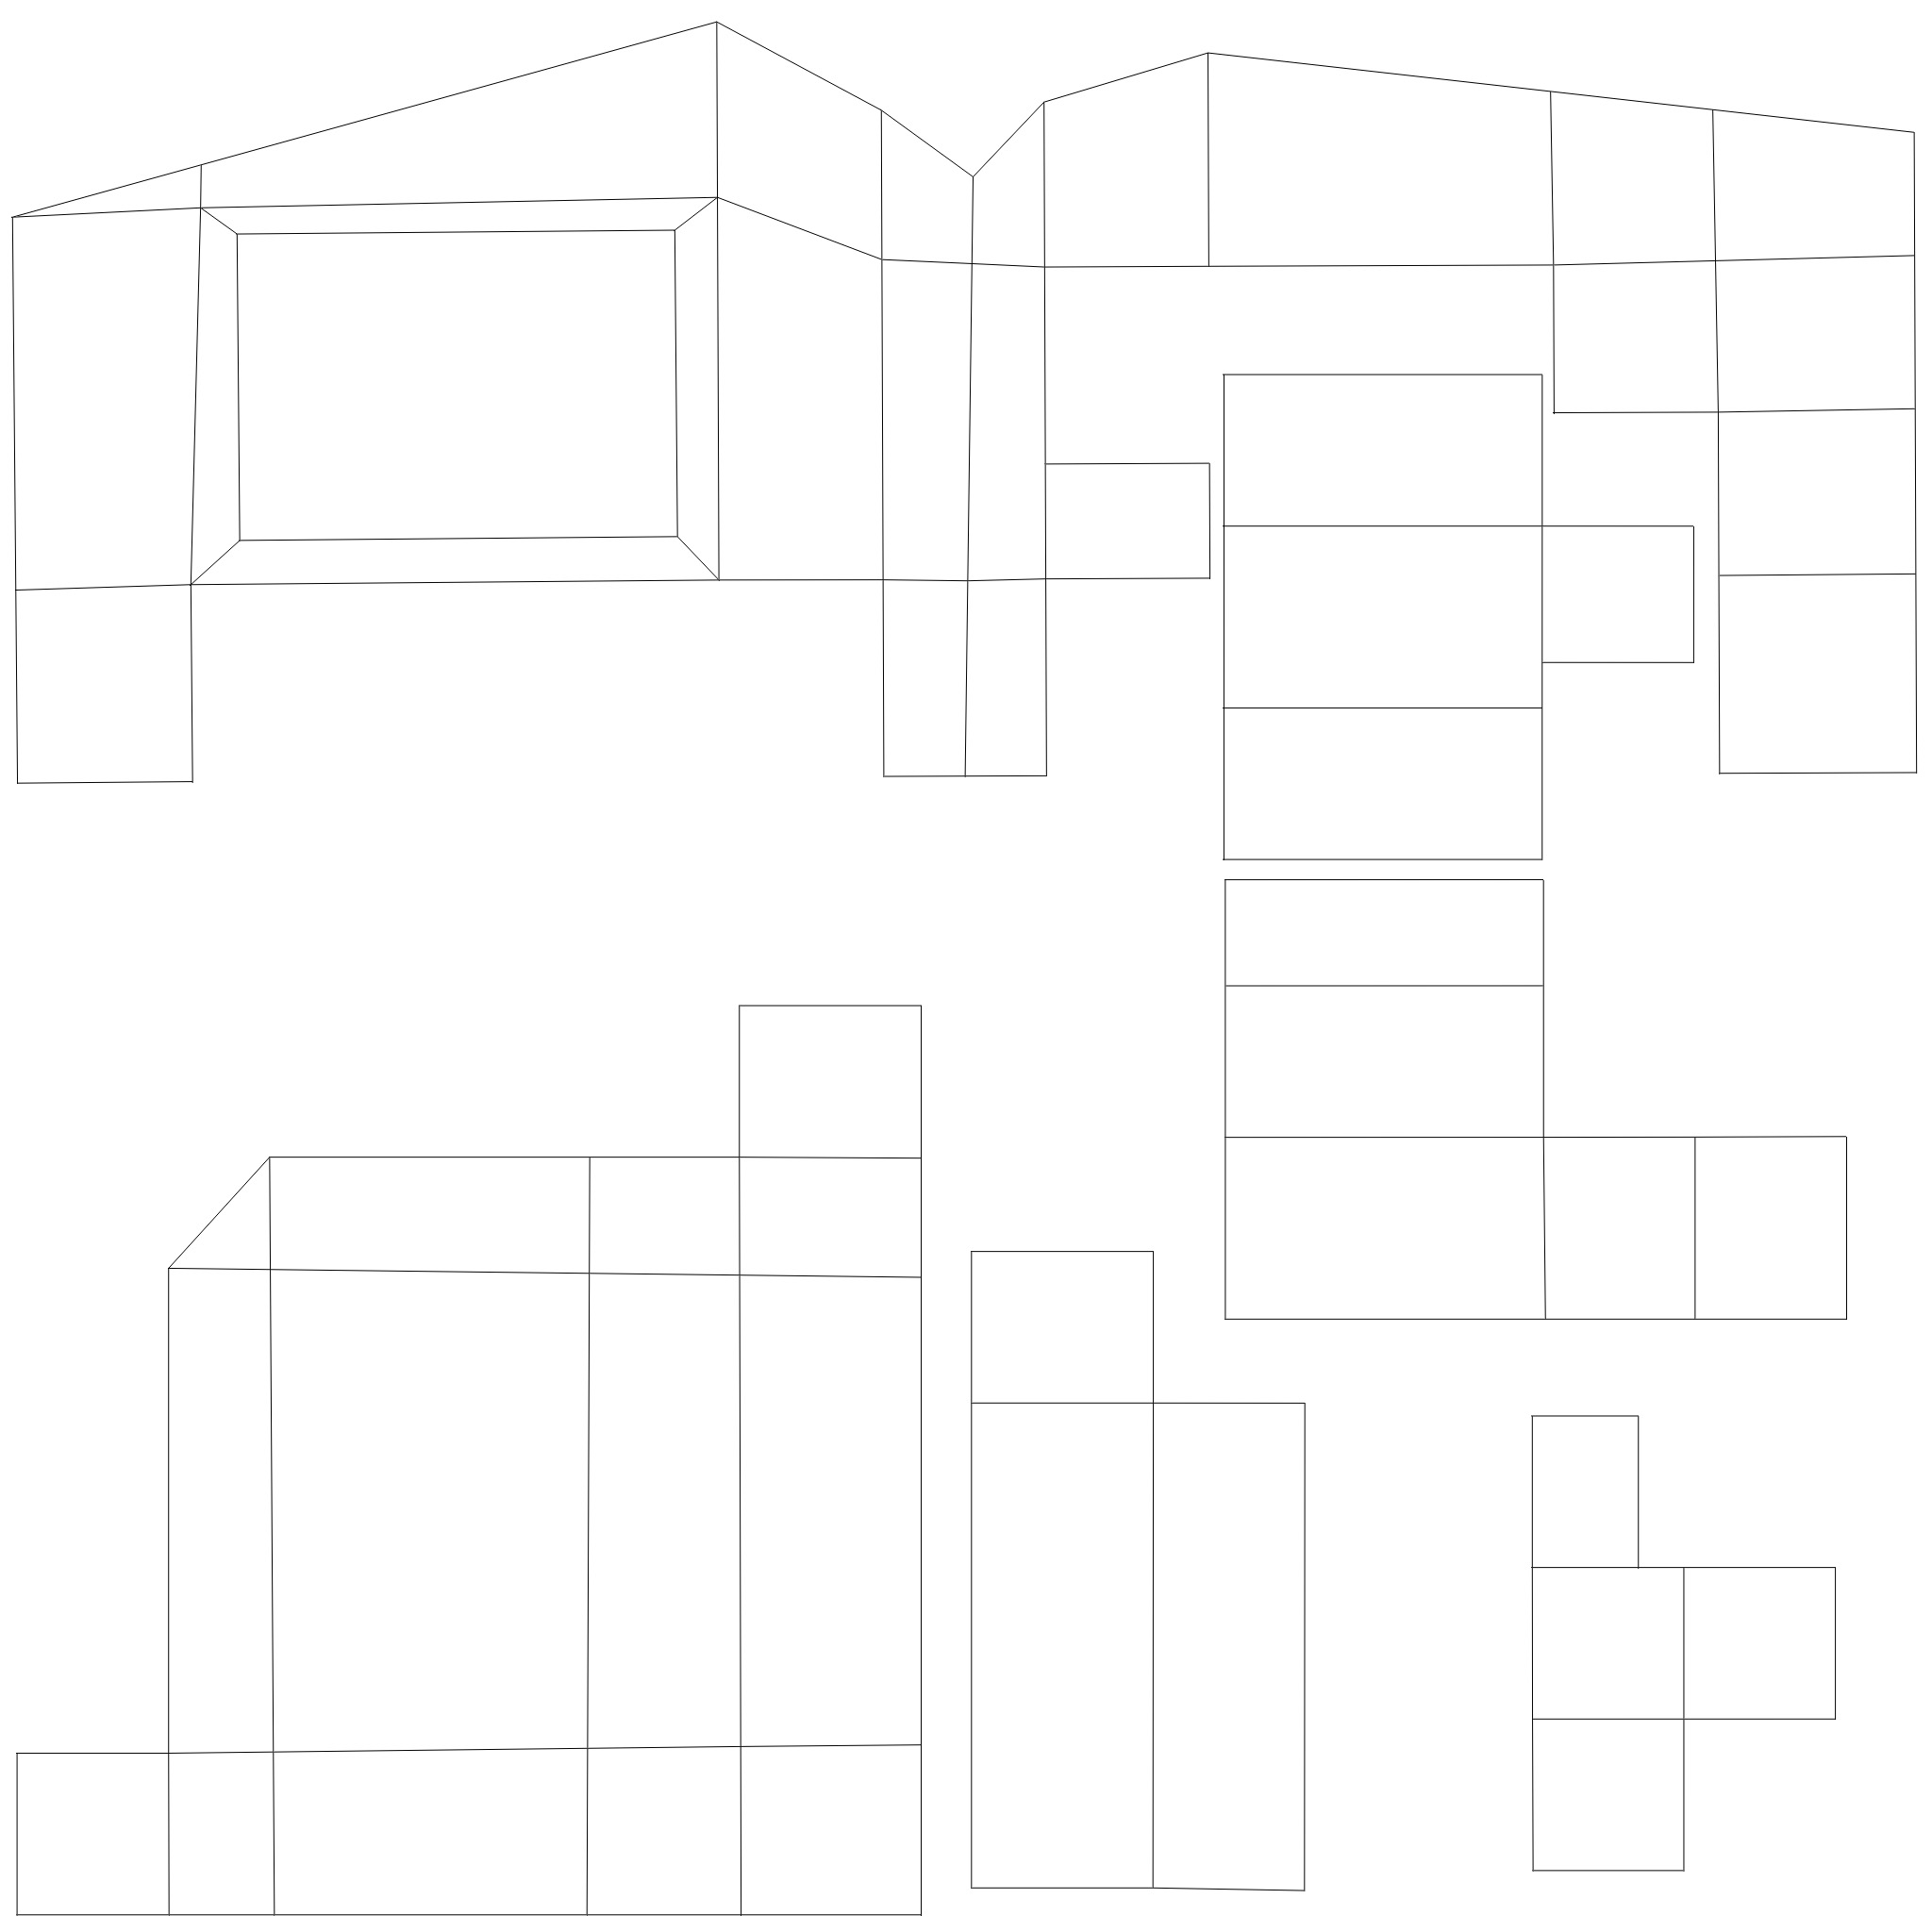
Here’s another mockup of the set projection, this time with the aim of projecting a circle. Oof.

In order to get a smooth circle onto the walls and closet, the UV map gets pretty choppy and weird looking.
Looks like so much fun right?! Well if you think that’s fun, also remember that we’re trying to map ANIMATION onto the set. Meaning if we want to map a circle onto the set in MOTION, each frame of motion will have to be cut up and mapped onto the UV map so it corresponds to the correct location on the set once it’s projected.
It would be humanly impossible to do that in the amount of time we have, and might drive everyone insane. Luckily there are some After Effects tools that can help the process along, and Theo has been doing some research into what will work best for us!
We’ve got a rough 3D model of the set built, and unwrapped it so we have a rough starting UV map. Hooray!
Now all that’s left is for us to see what we can do with this! Wish us luck and see ya next week, ya squares. Stay cubular.